The sometimes vexing and mostly curious InfoLithum M
As part of my business, I deal with a fair amount of batteries. I’ve dealt (and still deal) in all flavors of these: alkalines, nickel metal hydride (NiMH), sealed lead acid (SLA), the god-awful Nickel Cadmium (NiCd), Lithium Polymer (LiPoly or LiPo) and the now rather venerable Lithium Ion (Li-Ion). Recently, I purchased a really amazing camera for the production company, and in so doing have come into possession of some Sony InfoLithium batteries (the “L” type, for professional camcorders). As it happens, I already had some of them because of a piece of audio equipment that runs on those type of Sony batteries, but that’s not the point, is it?
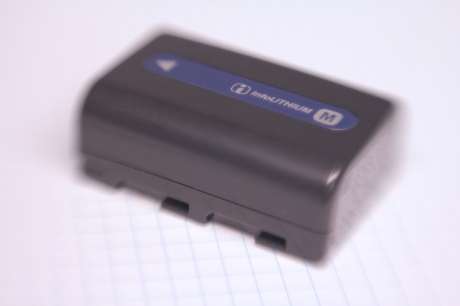
Years back, I purchased a Sony MiniDV camcorder, a really nice compact one. And as part of that, it came with a (now totally defunct and dead) InfoLithum M-type battery, model number NP-FM50. Now that those years have passed and this battery is no longer viable, I figure its best purpose is for science, wouldn’t you agree?

Yer days are numbered, bucko.
What makes InfoLithium so interesting is that it’s a smart battery, but doesn’t seem to follow any established smart battery standard. People have taken to hacking the InfoLithium data stream to try and get some answers for themselves, but most of the links on those forums have been dead for a while, and the WayBack Machine at the Internet Archive is no good either, as those pages either never got crawled or restricted search engine access. So while it seems the majority of the world has moved on from scrutinizing Sony’s InfoLithium data stream, I’d figure I’d give it a go.
Of course, I have to start by mentioning that under no circumstances should you ever ever ever dismantle a battery of any type, but especially Lithium Ion, Lithium Iron Phosphate or Lithium Polymer batteries, as they are some bad juju if they go wrong. The things that could go wrong is shorting the positive and negative terminals, piercing the cell with a metal object, overcharging, smashing/crushing and immersion in water. None of them end particularly well (at least for the battery), pyro eye candy notwithstanding. Suffice it to say, mishandling a lithium battery of any type can make big problems for you, so always buy quality and use only ever use chargers that the manufacturer of your equipment sells to you at top dollar. Yeah, I know, as if. Still, keep a fire extinguisher handy or have a rock solid response plan in case things go pear-shaped, as these batteries are not to be trifled with.

Oh look, it’s got no clothes on!
Okay, with the safety lesson out of the way, the first step of course is to get the lid open. It’s been glued or fused together at the seam (clearly visible on the side). A metal spudger would probably get you into the pack, but I used a handheld miniature flat-head screwdriver that was wildly inappropriate for the task. I prevailed nonetheless, and after cracking the lid and forcibly peeling it back with my favorite multitool pliers, there it was in all its glory.
The first thing I noticed was a tiny Atmel microcontroller staring back at me on the wafer-thin circuit board. Oooh, exciting, those little buggers are everywhere!

Pieces and parts!
Next, I set about desoldering the three terminals that connected the assembly to the case as well as the three leads(!) that connected the battery to the circuit board. Once that was done, the pieces came apart quite nicely.
So, let’s have a look see. Two cells, arranged nose-to-tail to get the 7.2V nominal voltage. But there was a middle bypass lead that shows that the charge controller was tracking individual voltages for each cell, which is of course what the best smart batteries do. Then there was a small paper-like dielectric pad between the cells and the circuit board, and then there was the PCB itself. Pretty darn simple, right? Let’s see about the Li-Ion cells.

A&TB (aka Toshiba and Someothercompany) LGR18500P
Looking closer at the individual cell doesn’t reveal a whole lot other than it is an 18500 lithium-ion cell made by A&TB (apparently a joint venture between Toshiba and, uh, someone else), model LGR18500P (and in case you were wondering, the “18” is the diameter of the cell in millimeters, and the “500” is the length. This is why you see the ever-present lithium “18650” cells, which happen to be 1.5 centimeters longer. Isn’t math awesome?!) Anyhow, there’s not much to be checked there, except that the cells are dead. Of much more interest (especially considering the hacking aspect) is the circuit board.

Oooh, circuitry!
Such a tantalizing little morsel. So tiny and delicate, my desire to hot air gun this sucker and reverse engineer the schematic was strong. Really. But of more interest is having a functioning circuit board that I can rig up to a test harness and put my digital scope through some of its paces. It may predicate me getting one of those USB logic analyzers in order to really sort this out, so stay tuned on that front.
Realistically, this is the heart and soul of the InfoLithium M battery, and it’s the reason that you can buy a $4 charger for the damn things on Amazon while the batteries themselves go for $60. These batteries solve a lot of their own problems. Starting this off is the Atmel AT90VC8534 (an obsolete 8-bit 8k . Then there is what appears to be a Seiko Instruments S-8232 battery management IC (thought it is marked “S8201”, it is an 8-pin TSSOP. Tell you what, if I find out that it’s different, I’ll let you know here). What goes on the underbelly, however, is a different matter altogether.

The enigmatic underside…
It’s a pretty tough nut to crack. It looks to have a Microchip logo on it, but the markings say “044” and “1488”, the latter looking a lot like a date code to me. And the absolute riot of microscopic surface mount devices really gives the lie to the seeming simplicity and elegance of the topside of the PCB. This is going to take a good deal of patience and testing to tease the meanings of these hardware bits. And don’t forget, this battery is at least 12 years old (date code on the Atmel is 2000), so it’s a bit of a tall mountain to climb.
And with the climbing metaphor, fellow traveler, we arrive at the destination of this little journey. It’s only the first step, of course, as I will be gearing up to strap this into a test rig, find some replacement Li-Ion cells that I can use as fodder, and trying to get this little bugger to give up some of its secrets. Based on what I’ve seen from the online sources I’ve looked at regarding Sony InfoLithium, I’ll need to have a test rig that can send a signal (as if from a camera) that gives the battery pack something to respond to. That’s where we’ll start.
If you liked my rather long-winded approach to tearing something limb from limb, or even if you hated it, let me know in the comments. And if you’re interested to know, the photos are done using the Lensbaby creative lens system on my (wife’s) Canon 60D with a 4x or 10x macro optic on there to get it nice and close. Cheers!
More photos, done by stacking the 4X macro and 10X macro optics on the Lensbaby. The lens was about an inch distant from the board.

Obsolete!

Mislabeled?

???

Reverse engineer THIS, chump…


Thanks mine failed and since I don’t know if it is the battery or the charging circuit I will buy a new camera and it won’t be a Sony. I did manage to force charge it one cell at a time we will see if it catches on fire.
Hi , did you manage to get further in your analysis? I stumbled along this page because I have a Sony HX9V, which takes absolutely stunning action video on the snow, but the cold kills the battery (NP-BG1) in minutes. I wanted to see if it was possible to create an external battery pack that could be kept warm. The battery hatch come with a movable notch to allow external battery wiring to come into the battery compartment, but I have never seen any aftermarket solutions for these handheld cameras.
Hi Colin! I haven’t really done much with it since tearing it apart. And looking at the NP-BG1, that’s a flat Lithium Ion battery pack, and looks like it would take fashioning a “fake” battery yourself with a wire to an external pack. I don’t really recommend doing that, as you’d be on the hook to build it all, and if it breaks your camera, then you’re the lucky owner of a broken camera that used to take absolutely stunning action video. In all things, YMMV. Thanks for commenting!
Hi Randy, thanks for the reply. I don’t mind making stuff, but I am after a bit more on Li-Ion battery theory, as I am a bit rusty on my electronics, especially for these modern, and possibly intelligent batteries. At the basic level, I think I can fashion a dummy battery with external connectors, including a quick-release, and keep the real battery on my person to keep it warm. But is it possible to do more than that, like somehow link them in parallel (with only one with data pin connected), or does the Infolithium electronics not like that? Does Li-Ion even like that?
Ideally, it would be preferable to link it to a larger battery pack for simplicity – this is something common on their videocams – the compartment can take different sizes.
Just looking for (safe!) ideas…
cheers,
Colin.
The “info” in Infolithium is the circuit board, obviously. What you need to be aware of is that the protocol is not open, so you would have to reverse-engineer (to whatever degree it is possible, I think a logic analyzer would be some help here, maybe a Dangerous Prototypes BusPirate). There’s the possibility that the protocol is reasonable to decode, but will take time and a lot of analysis.
Now, that said: I think that if you were to link multiple battery packs in parallel in some fashion, the circuit board whose data pin was actually connected to the camera would see the power level of all the batteries and behave accordingly. (Warning: pure conjecture follows) it may be that the Infolithium brain may have some preconceived notion of capacity, but I believe it’s mostly in place as a charge controller with a voltage sensor to know when the LVD kicks in.
When it comes to safety, be extra careful. This might be an opportunity to use a 3D printed part (that fits in the battery compartment) to hold the metal contacts that would then connect the “umbilical” that goes off to an external battery pack to actually power the camera. Just riffing there, however.
Let me know what you come up with!